Integrating your Dext Prepare and QuickBooks Online accounts will enable you to send your Dext Prepare items directly to your accounting software with all the relevant item details applied.
Once integrated, you’ll see a Publish button that will allow you to send your items from Dext Prepare to your accounting software.
- Setting up the Connection
- General Settings
- Advanced Settings
- Publishing
- Publishing Errors
- Features supported using the integration
Setting up the Connection
Prerequisites:
- To be able to integrate with an accounting software you must have Administrator level User Privilege access.
- If you cannot see the Connections section in the sidebar it means you don’t have this access. Reach out to your account administrator or accountant/bookkeeper to request access.
- If you’d like to publish multiple currencies, you’ll need to enable multi currency within your QuickBooks account.
- If you’d like to mark an item as a billable expense in Dext Prepare, you’ll first need to set this up within your QuickBooks account.
- QuickBooks Easy Start is the same as QuickBooks Online Simple Start.
To connect your Dext account to your QuickBooks Online account:
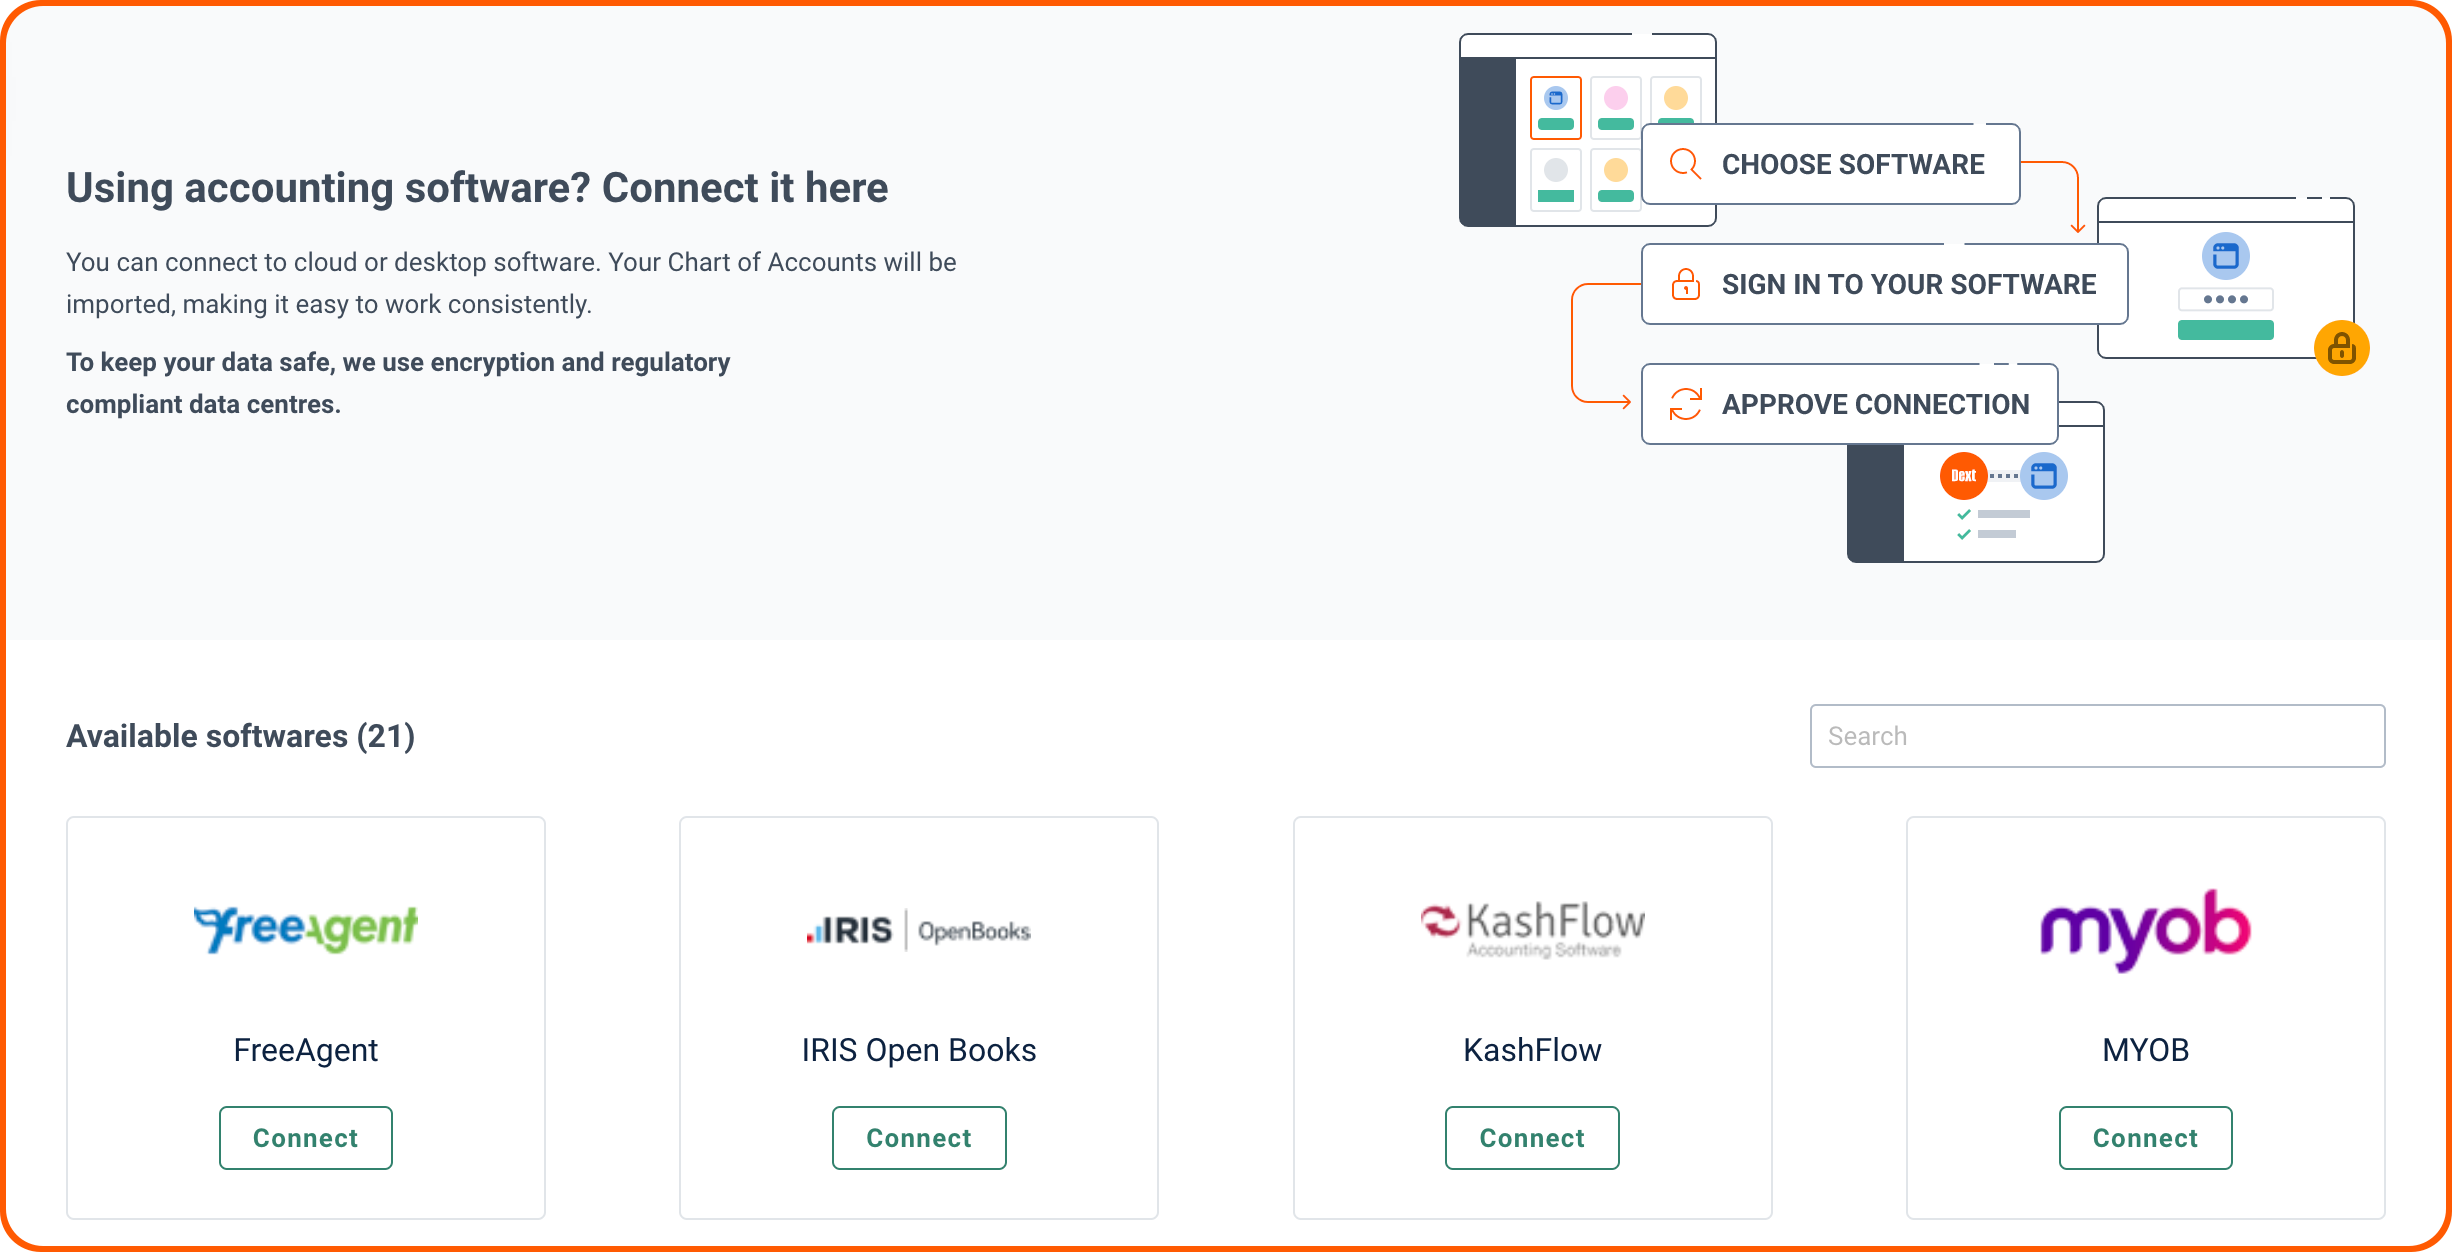
1. Navigate to the Connections section of the sidebar, then Integrations.
2. Find QuickBooks Online in the list of Available softwares, then click the Connect button.
3. Click the Connect to QuickBooks button – you’ll be redirected to QuickBooks Online and prompted to log in to your account.

4. Follow the steps provided until you return to Dext Prepare.
5. Finally, you will see a confirmation that the connection has successfully been made. Click Finish.
After integrating, please allow a few minutes for all the category codes and lists to synchronise.
What happens after you’ve integrated?
After integrating, your Chart of Accounts, Suppliers, Customers, Classes, Locations, and Payment Methods will be synced between the two softwares.
If you make any updates to your lists within your accounting software, these will be updated in Dext Prepare automatically every 48 hours.
If you’d like to see these lists update sooner in Dext Prepare, you can manually refresh your lists. Take a look at this article for more information on managing the connection.
If you submit a document in for a new supplier or customer, this will be added to your supplier or customer list in Dext.
General Settings
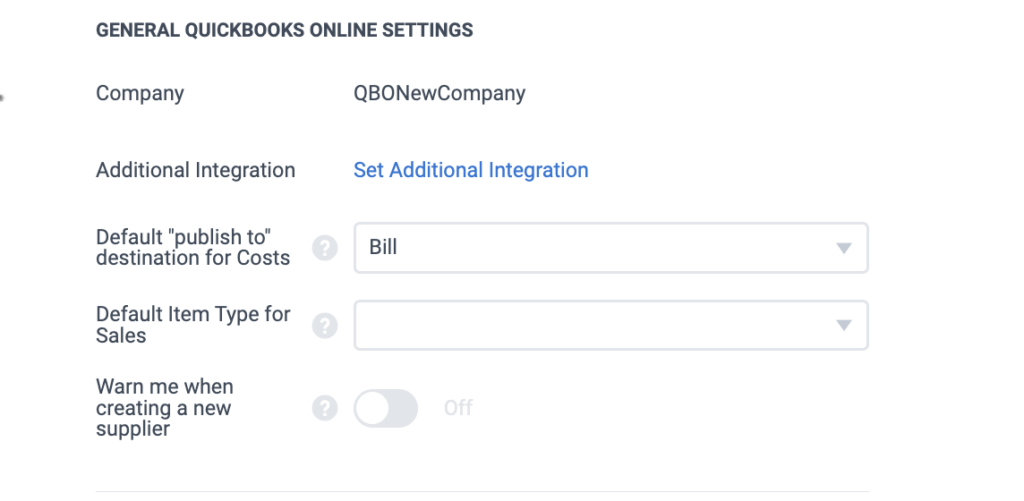
From here, you can set a default publishing destination for cost items and a default item type for sales items.
This means any cost or sales items you upload will have a publishing destination or item type automatically added to them.
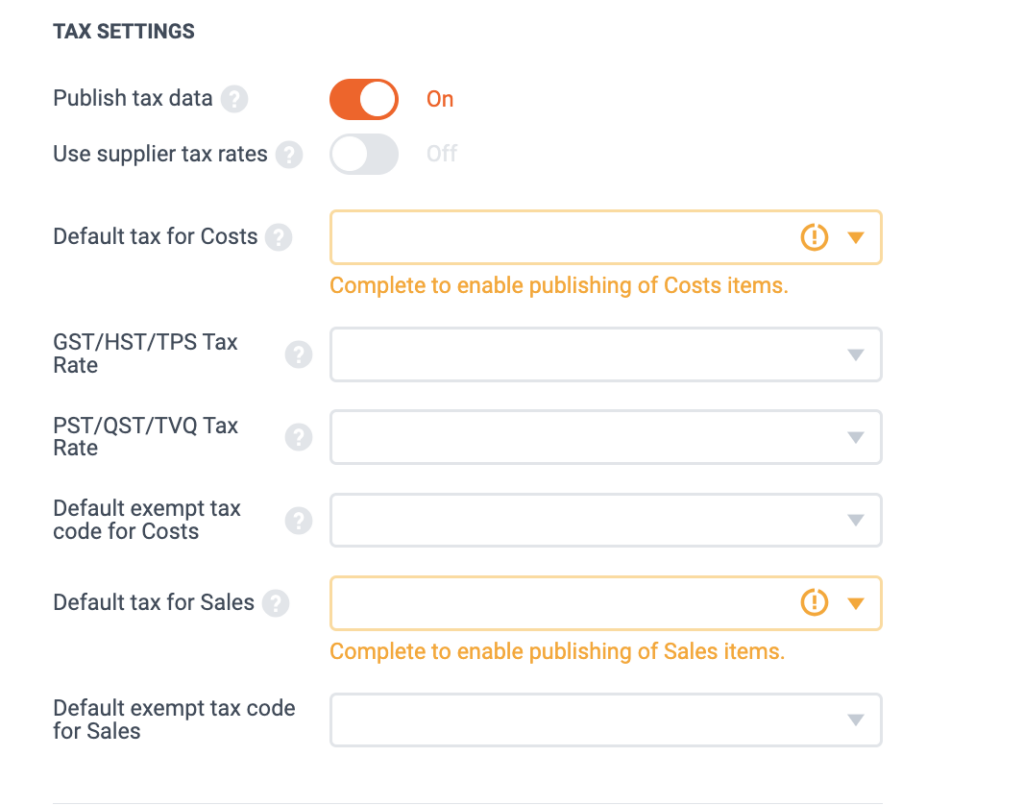
You can also set up default tax settings and select the default tax rates for both cost and sales documents.
Please note: Before you can publish your documents to QuickBooks, you’ll need to set default tax rates for cost and sales. You’ll receive a publishing error if you haven’t set these up.
The default tax settings will not overwrite any supplier rules you’ve set up and you can still edit the tax details manually from the item details page for each item.
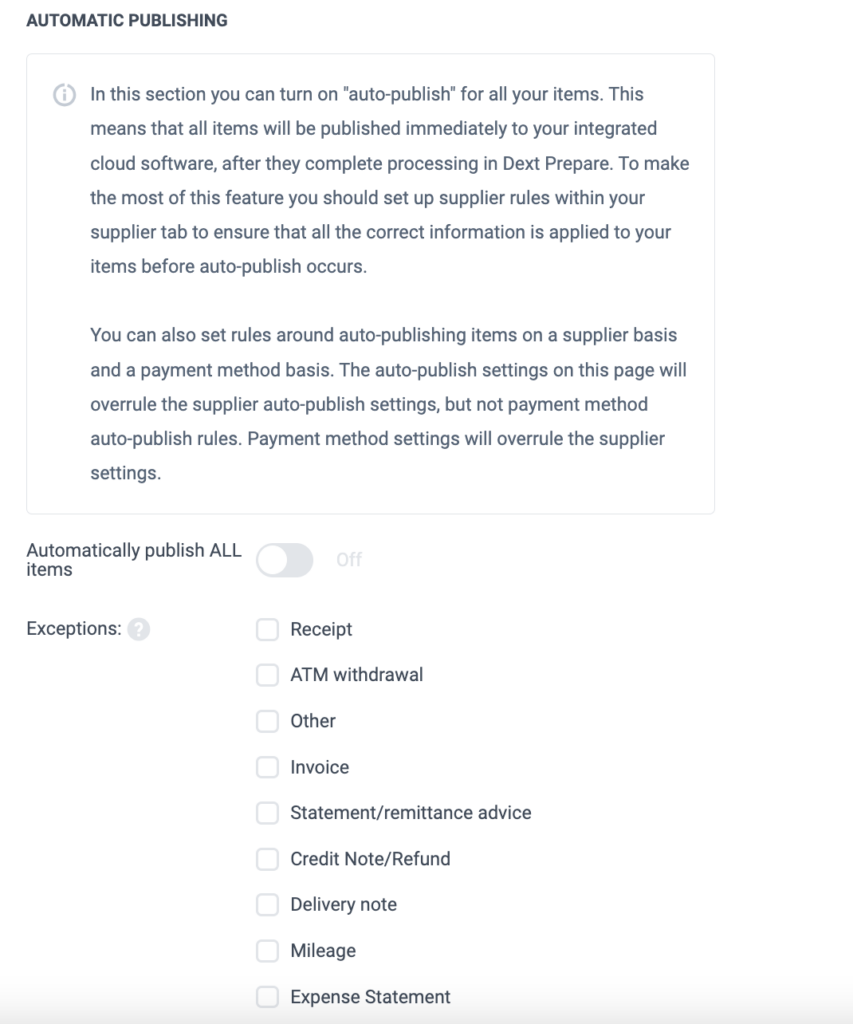
And lastly, you can turn Auto-Publishing on at account level from within these settings. This means all documents submitted to Dext Prepare will be automatically published to QuickBooks.
You can set up supplier rules to ensure the correct information has been added to your document before publishing.
You can also set Auto-Publishing up at the supplier level. This means not all documents submitted will be automatically published and it will only be for the suppliers that you select. For more information on how to set this up, take a look at this article.
Advanced Settings
You’ll need to set up the payment method before you publish your items as paid.
If you’d like to update your tax settings, take a look at this article.
If you’re based in Canada and have secondary tax rates, take a look at this article on how this works in Dext Prepare.
If you use Class Tracking within your QuickBooks account and would also like to use this in Dext Prepare, take a look at this article for more information.
If you’d like to publish your documents to a bank account within QuickBooks, you’ll need to link your payment method to a bank account in Dext Prepare first. Take a look at how this can be done here.
Publishing
You can publish a variety of different documents to your QuickBooks account including: Cost and Sales Credit Notes, Sales Invoices, Multiple Currencies and Billable Expenses.
You can also mark your documents as Paid and Not Paid when publishing.
If you mark your items as Not Paid, this will publish your item as a Bill will create an item waiting to be paid in QuickBooks.
If you mark your items as Paid, you can publish your items as Cash (via Cash account), Check (via Check) or Credit Card (via Credit card) and the items will go to expenses.
Take a look at this article for more information on how to publish your items to your QuickBooks account.
Publishing Errors
From time to time, you may run into an error when trying to publish your documents.
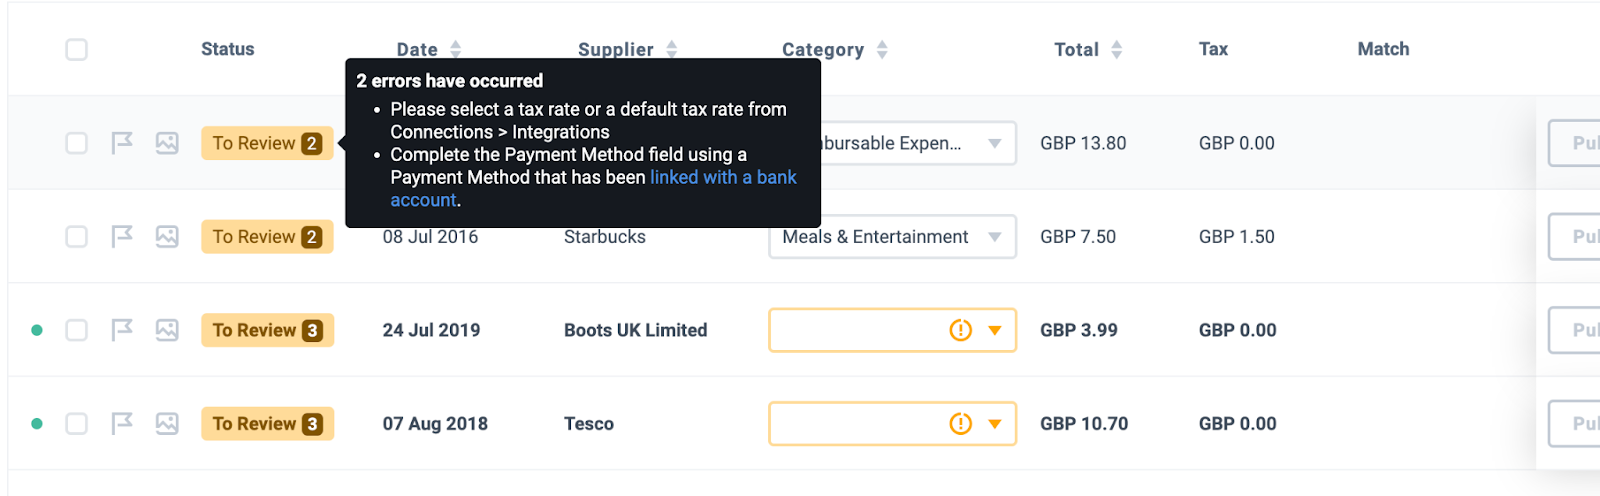
If you run into trouble, you’ll see a ‘To Review’ under the Status section in the Inbox. If you hover over the ‘To Review’ section, you’ll see the error message and how to resolve this.
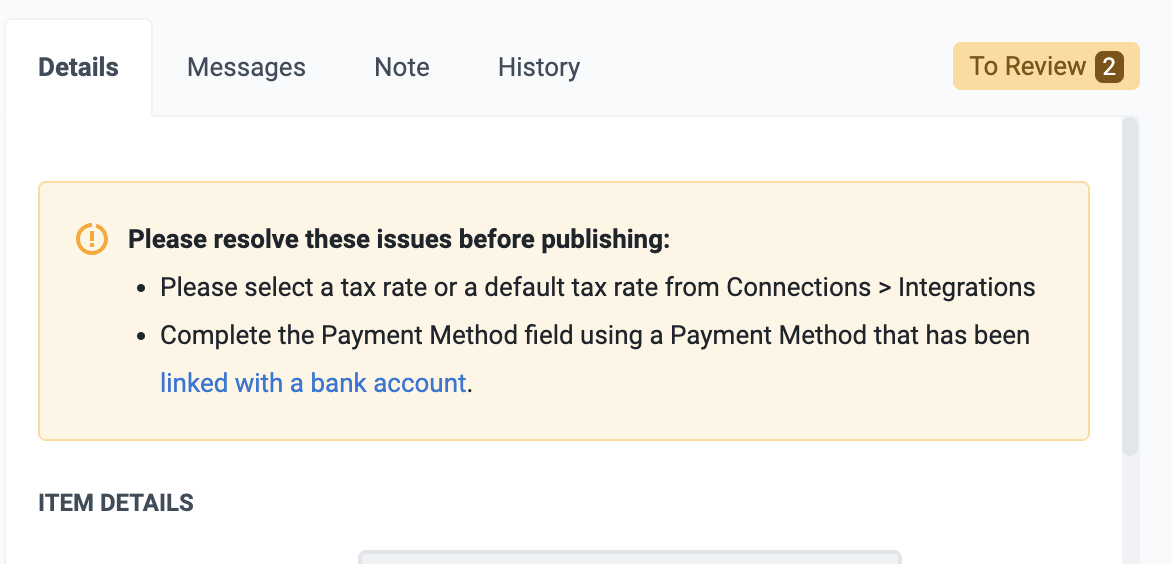
Alternatively, you can click into the document and under the Item Details, you’ll see any error messages here.
To view more information on publishing errors, check out this article.
Features supported using the integration
Classes and Locations are available within Dext Prepare if they’ve been enabled in QuickBooks. | QuickBooks will not accept multiple Locations. You’ll need to publish your items using one Location and not multiple. You can however publish multiple Classes. |
Extracted Invoice Numbers will be published to QuickBooks. | |
If a Receipt has a certain reference number on it, this will be published to QuickBooks. | |
The publishing destinations for QuickBooks Simple Start are Cash (default),Check and Credit Card. | This means you can only publish items as paid. You’ll need to link your bank accounts and payment methods in Dext Prepare in order to publish your documents. |
Tax rates must be set up in order to publish your items to QuickBooks. | The tax rates you set will depend on your location: ANZ: We recommend the Default tax rate to be assigned – GST on non-capital. UK: We recommend the Default tax rate to be assigned – 20.0%. US: The US tax model excludes all tax from being applied on purchase items – for this reason, Dext does not send tax to US QuickBooks accounts. Publishing tax data should be off. There are exceptions if you have tax codes/rates set in QBO and Dext will pull those accordingly. Canada: The tax rate should be set for the province/territory in which you or your client is registered. |
Tax rates for Canadian customers | We recommend the following tax settings in Dext Prepare for the majority of Canadian users: Publish tax data: ON Default tax rate: The tax rate for the province/territory in which you or your client is registered For example, HST ON for an Ontario client Use supplier tax rates: ON When using the Secondary Tax rates, we’d recommend that your default tax rate is a combination of your secondary codes. For example: 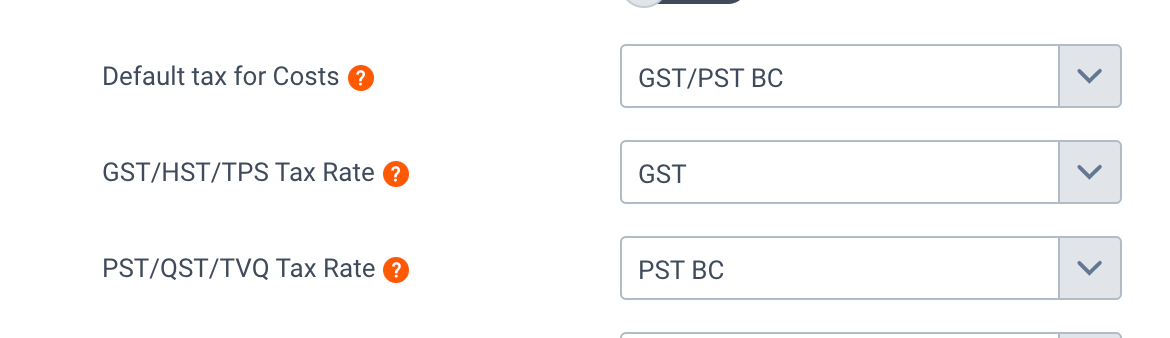 |
Purchase Order Match in QuickBooks | When using Purchase Order Match, this doesn’t send the bill to QuickBooks. It will leave a note stating the match is done. It will leave a note in QuickBooks as well as in Dext. |
| You can publish Expense Reports to QuickBooks. | The Expense Report can contain multiple item types. The total will need to be a positive figure in order for it to be published. |
| Inactive Customers still appear in Dext Prepare lists | If you make a customer inactive in QuickBooks, they will be unlinked in Dext Prepare – but we will not delete them. |
QuickBooks Essentials Plan | We do not sync Customers for cost items on the QuickBooks Essentials Plan. We sync Sales Customers when the plan is QuickBooks Essentials. This means you can assign Customers to sales items only. |
| The Construction Industry Scheme (CIS) in Dext Prepare | You will need to manually adjust the ‘Less CIS’ field in QuickBooks once you’ve published your item. |